Here is the final blog post of Laura and David’s maternity photography shoot at Schwerkolt Cottage in Ringwood. This was my first attempt at this kind of shoot, but these gorgeous guys made it easy for me I think. Since that shoot, Laura gave birth to a healthy and beautiful baby girl named Marie-Claire. If you are after a maternity shoot for yourself or as a gift, feel free to drop me a line from the contact page or the Facebook page or even go old school and call. The shoot session fee including location shoot 1-2 hours and a viewing of the edited images is $190, with prints starting from as little as $75. I think every couple should have a shoot like this to celebrate a truly beautiful time in their lives.
Last Monday was the wedding of Sally and Brenton at All Smiles of the Yarra Valley. With the Converse kicks to the funky S&B custom logos on everything, makes it photographer’s gold. Add to that a couple very much in love, we made some awesome images that day. Here is just a taste. Be sure to like my Facebook fan page to be notified of the next instalment.
Welcome to Chloe and Adam’s wedding blog post. It has been a while since my last full post, I have been busy, so there is much more content to come. On top of that new branding! I’m busily changing over all of my marketing collateral and developing new product samples, all for a more identifiable brand and better reflection of who I am as a photographer.
So back to the blog post, I’ve known Adam for a while which is always great for an awesome day of photography. The Ballara Receptions venue was most impressive with their recent renovations, updating it to a great standard. Plus the food, so good! I’m most impressed. I thank Chloe and Adam for choosing me as their photographer, I had a ball at your wedding and I’d really appreciate if you (readers) share this post and like my newly renamed Facebook Page. Also thanks to Paul Benjamin for being my second photographer for the day.
Hello blog readers, it is time for another maternity shoot sneak peek, this time from couple Al and Glen, who are due with their first later this month. I was struggling for ideas for a location but I put myself in full research mode when I got the hot tip to look at old train stations. I decided on the disused station at Healesville only going off low resolution images on Google. Well I was blown away by how cool this place was and Al and Glen were excited at the locations potential. Maybe the little one will love trains! The light was great, there was many places to explore and we all had a great time. Be sure to share this post too….Cuteness factor 1000!
There is always a time in a photographer’s career there will be a subject that you haven’t photographed before. Even though photographing people is nothing new to me, having the focus being a baby bump (albeit this one was fairly well advanced) it was a new and different challenge for me. If I had learnt anything from my week long photography workshop I had in March, it was suggested by master photographer Jerry Ghionis that I shoot my own projects to grow as a photographer and go find some work by talking to people around me.
So I took that aboard and approached the gorgeous couple Laura and David, due September and organised a shoot with them. I must say these two were a dream in front of the camera, their mannerisms, interactions and affection for each other truly made great images. I didn’t even have to direct them half the time! I hope you enjoy them as much as I did photographing them. Share that baby love by sharing this post using the Facebook share button at the top of this post.
Here is a little sneak peek of Chloe and Adam’s wedding Ballara Receptions in Eltham. Be sure to share or ‘like’ this post and feel free to Pin any of the images to your Pinterest page.
Well it has been some time since my last blog post, so to keep those winter blues at bay I have a warm and fuzzy collection of images from Erica and Ryan’s Wedding down in Sorrento earlier in Autumn. The day started off in two gorgeous rental properties just outside of town where Erica and Ryan got ready for their big day. This is always a bonus from a photography point of view having these well set up and bright rooms. The ceremony commenced under the beautiful big Gum Tree at the top of Sorrento Park, where Erica and Ryan’s beautiful story was told and their hands joined in holy matrimony. We had a great photo session in and around Sorrento Park including down by the beautiful trees lining the road (what a gem this place was). The reception rocked on into the night after some speeches full of laughs and tears. I did mange to steal them away from the festivities for a short while for photos on the point on the Sorrento Back Beach before the sun went to bed for the evening. I hope you enjoy the photos, all of Erica and Ryan’s wedding suppliers are listed below, so support local and click on their links. Be sure to share this post too!
Also a big thanks to Alexander Gardner and Jeremy for your work that day!
Here is a sneak peak from Alana and James’s wedding at All Smiles Sorrento. A gorgeous day with a gorgeous couple. Full blog next month with all the wedding’s details. Please share using the Facebook Share button at the top of this post to share with other guests and family from the wedding.
A warm congratulations to Alana and James who got married yesterday at All Smiles in Sorrento. It was a pleasure to photograph your wedding, you two are an absolutely gorgeous couple. A sneak peek of the wedding will be posted later in the week.
Welcome to the last blog post of 2012 where I’ll show you my favourite images taken in 2012 from some of the weddings I have photographed. There isn’t necessarilly every wedding I photographed in here, just my personal best, why I think they are special and a little critique on my approach, vision and technique which may help some other photographers get into my head. Please enjoy the images, I’d love if you would share this post by clicking the Facebook Like button at the top or bottom of this post or if viewing on a mobile device use the share feature located at the top of the Facebook toolbar or directly from my page.
This year for me has been life changing with (for those who know me) incredible lows and some amazing highs. I want to thank my clients for giving me the opportunity to shoot their weddings, my family and colleagues for their support in my drive to take me to the next level with my business. If you hear of anyone getting married or getting engaged I’d love to get those referrals. Cheers to an amazing 2013.
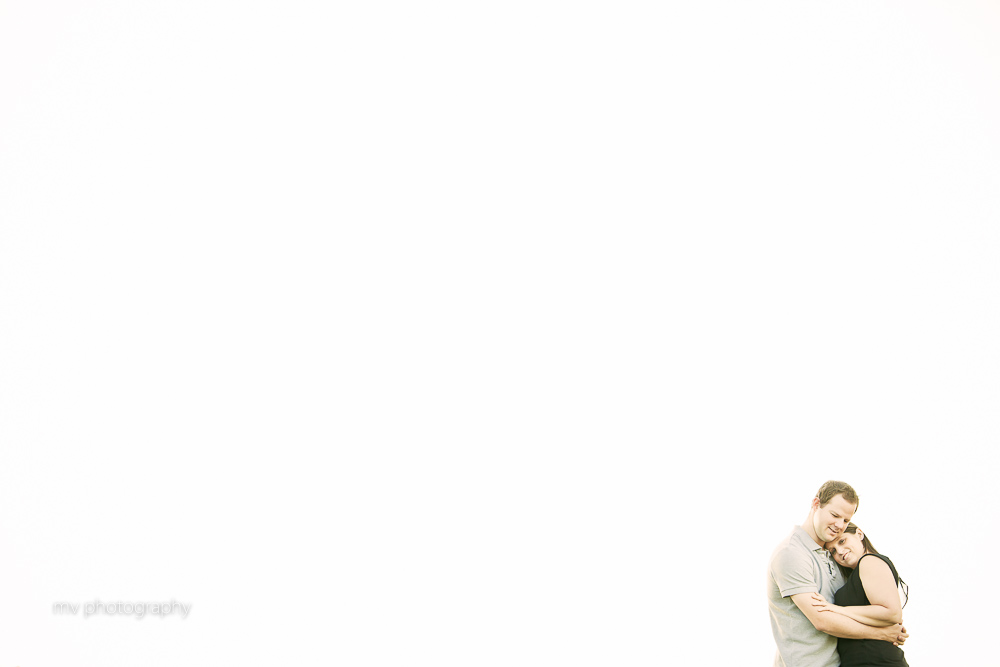
This is from Alana and Vitaly’s engagement session at a park in Doncaster. This crop you see is how it is out of camera, I just shot with a good aperture to make sure they would be sharp in the corner of the frame. I exposed for their skin using the spot meter of the camera which blew out the sky behind them to white as the sun was setting behind them. Overall I’m happy with this image, I like the unusual crop and their posing fell into place nicely.
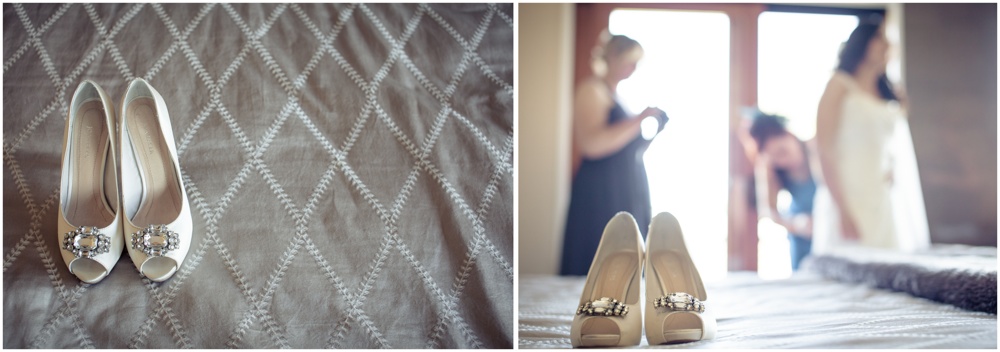
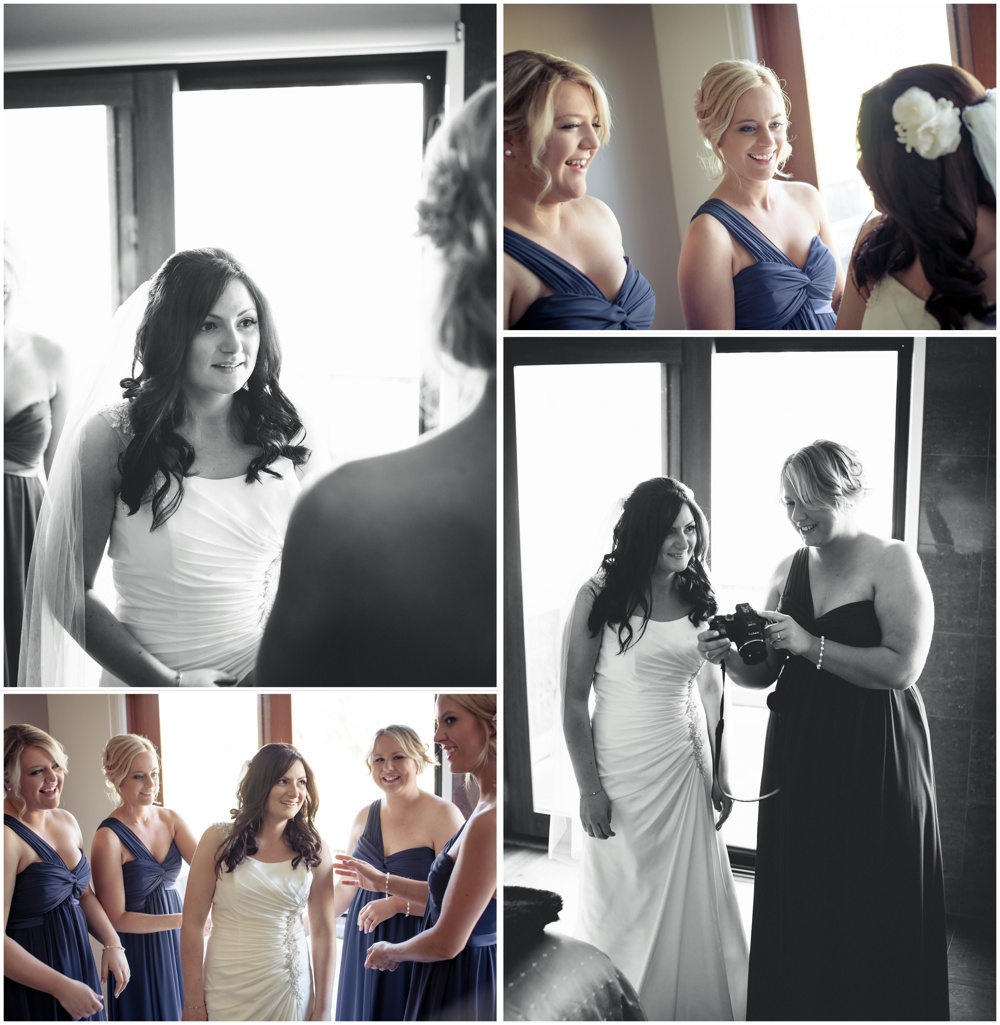
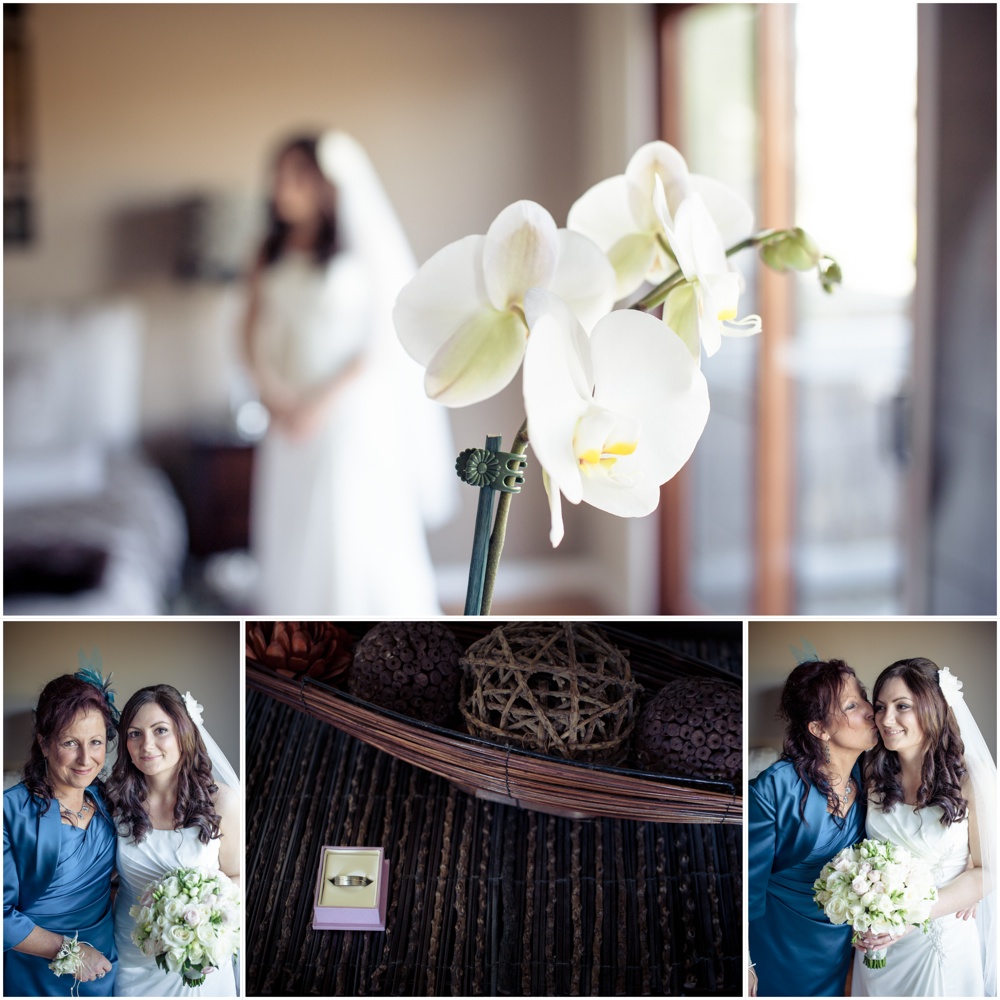
From Alana and Vitaly’s actual wedding, see the full blog post here, we see Alana’s mum doing up the gorgeous necklace they bought for her on her wedding day. The contrasty light was deliberate giving the image a sense of intimacy I think. Even though this moment was totally as it happens the light was very controlled. Before they entered the bedroom where Alana did her bridal shoot, I closed the curtains a bit to get a slither of light and turned off the main room light. I used the spot meter to expose for the highlight side of Alana’s face because I knew the rest would fall to shadow quite nicely. Nothing but a monotone preset was used to get the final image.
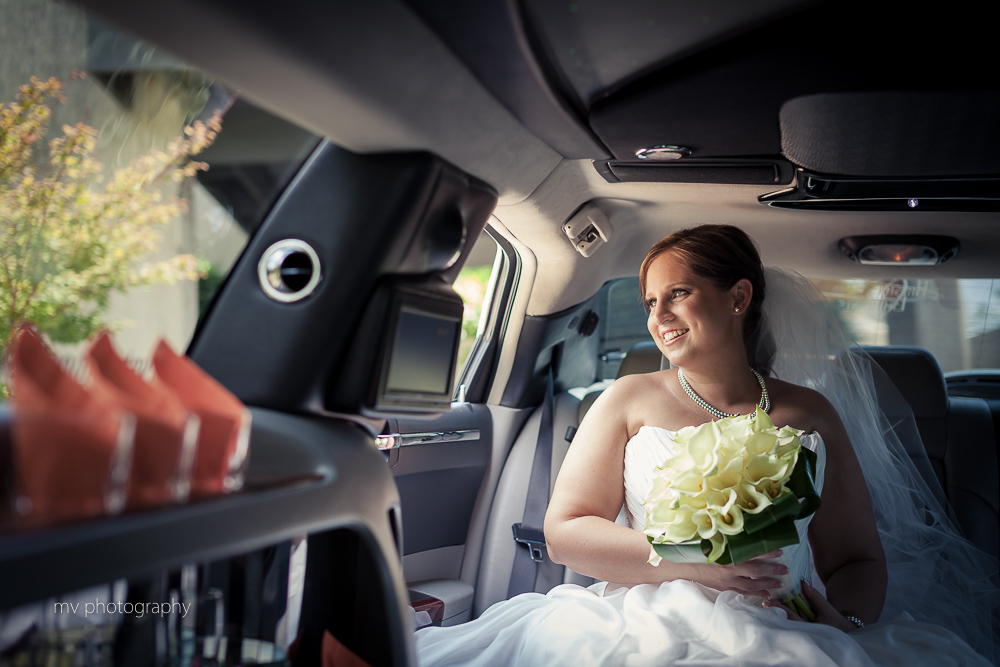
I love shooting in the back of limos, maybe because I’ve hardly risen in them myself? Nothing but the light from the open rear window was used here as the rest of the windows were quite dark with gave the light good direction. I asked Alana to look at her dad so she had some actual interaction which is evident on her face and she can look at this image and remember that moment. The only problem I have with this image is that I didn’t do more with her hands so they’d look more natural, rather than just draped there.
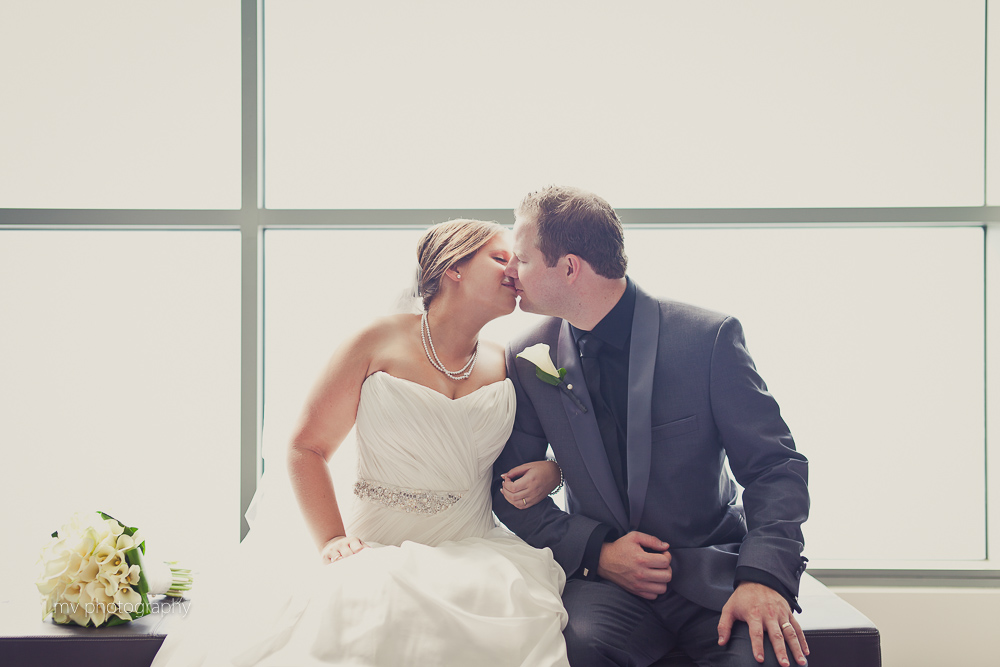
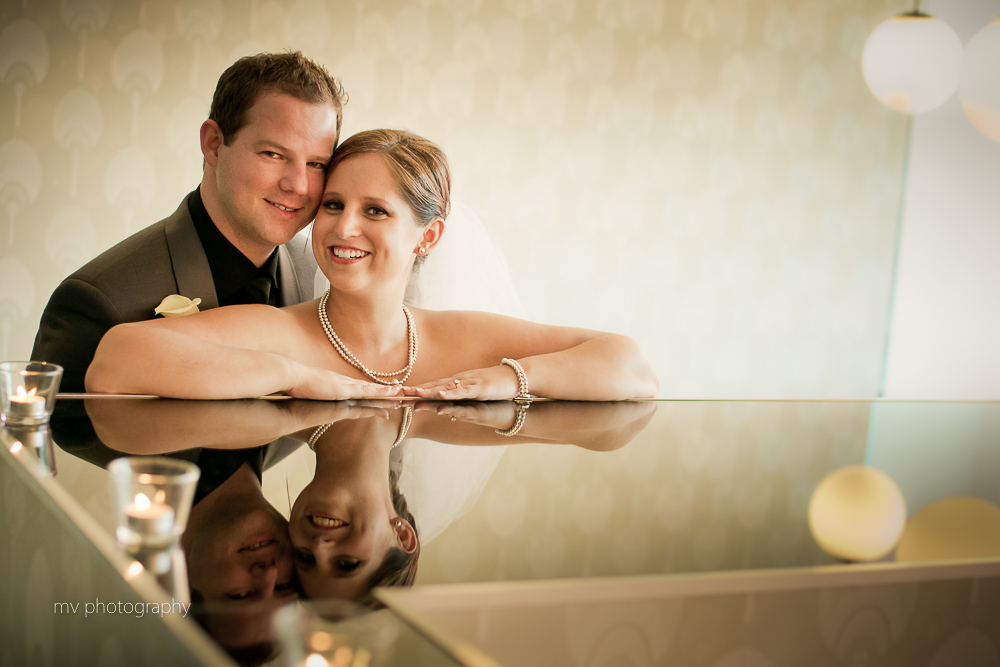
Yes another one Alana and Vitaly’s wedding, it was just such a great wedding to shoot, the light was perfect everywhere. This location is as simple as hell, it is just the waiting foyer/area for the elevator bank at the Melbourne Library, I knew if I exposed for their faces the windows behind them would go pure white, its something only a photographer can see. The ambient light in the room was just reflected light from the windows behind them and a couple of low power CFL bulbs in the ceiling. The pose was simple but effective, the placement of the flowers were deliberate, but the only thing I don’t like, but couldn’t change was the position of the frame which passes through Vitaly’s head, but if I had stood up a bit more I would’ve lost the vertical shape of the rest of the window frame.
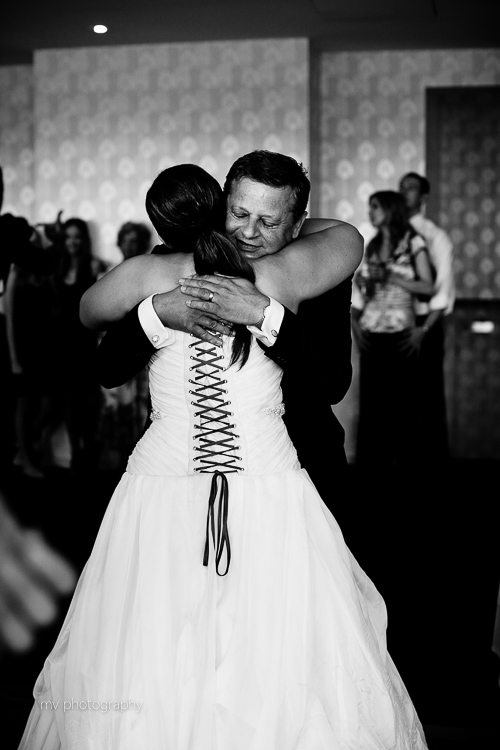
Ok this is the last one from Alana and Vitaly’s wedding, but here we are at the gorgeous River’s Edge Events venue. This was purely the right place at the right time moment where Alana’s Dad hugged her just after them having a little dance together. The light was from the windows that were behind me as the room was quite dimly lit, which gave great direction of light and a background that fell to shadow nicely.
No I lied, just one more. I wanted to put this one in due to the technique used, which takes a keen eye to recognise. This is the stair well bannister for River’s Edge Events which is lined with black glass so I could get a nicely sharp reflection. I had Alana get close to the wall and actually stand on the top step as tall as possible, then I had Vitaly come in from behind but with his legs bent in such a way his height would frame better in camera. I positioned myself so I would get both the light fixture in the background and the candles in the foreground. I knew from the lens and aperture I was using I would get them nicely out of focus to get a nice soft highlights around the couple. The light is from a window just in frame to the right and in-turn reflected from the wall to camera left. Alana’s pose gave her good shoulder definition and the tilted up chin gave a slimmer appearance to the neck to increase elegance. The only thing I would change in camera would be I needed Vitaly’s face to come forward a bit to get more light on him because I was required to touch it up a bit in post.
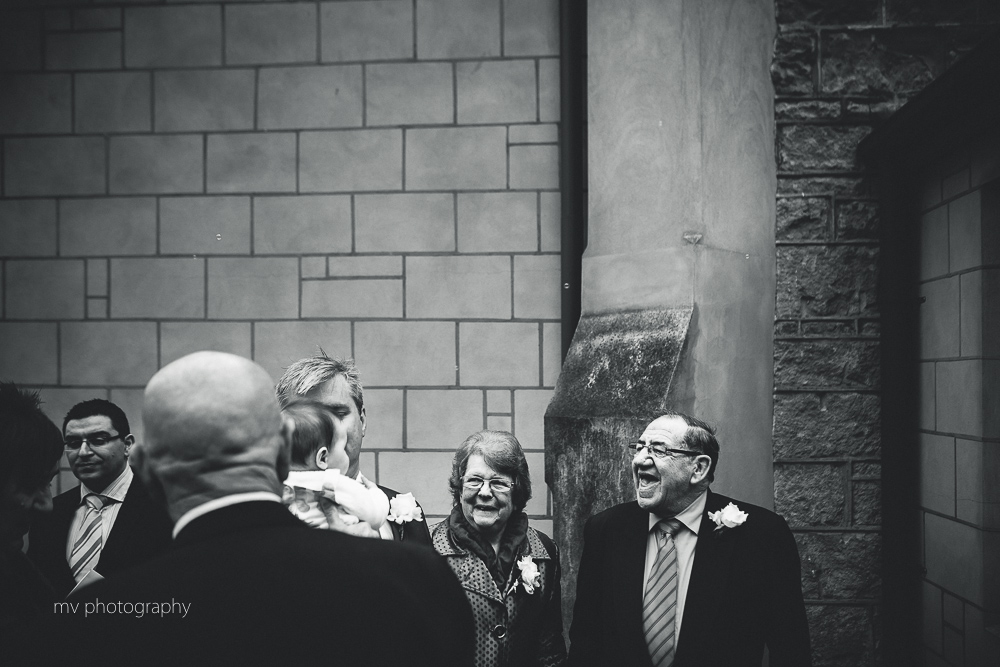
Everyone loves candid reactions between adults and kids and in this case it was the Great Grand Parents of this little one (I think). This occasion was out the front of the church that Jade and Bruce got married at in Lilydale. Nothing much to say but the light was soft because of the overcast sky given a little direction by the subject’s proximity to the building and the big trees nearby. The camera was trained on them as I saw them trying to get a reaction from the child, which is partly obscured by a passer by. But I just love the faces, and I would think Jade and Bruce would love it too.
This images was a heap of fun to do. This wedding was in the middle of June, so it was a little on the cold and wet side. The location Jade and Bruce originally chose was washed away with a small river running through it so I had to come up with a plan fast as time was slim. To take refuge from the rain, they parked themselves in front of this fish and chip shop in Olinda. I came up with the hair-brained idea of getting some chips from the shop and asked for permission to shoot there for 15 minutes. The idea was welcomed by the couple as they were cold and hungry. I got them just to have fun with each other and I snapped away. The lighting was from the very overcast sky to the point where it was super flat with no direction. The alcove they were under gave them nice even light with no hot spots on the white dress. This area is special to them as they dated quite a bit in the Dandenongs, especially in Olinda. I tried the same shot with off camera flash, but this one was the best.
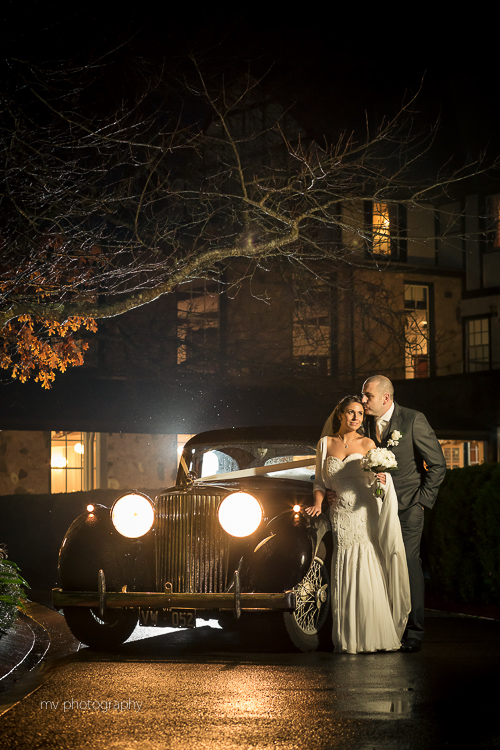
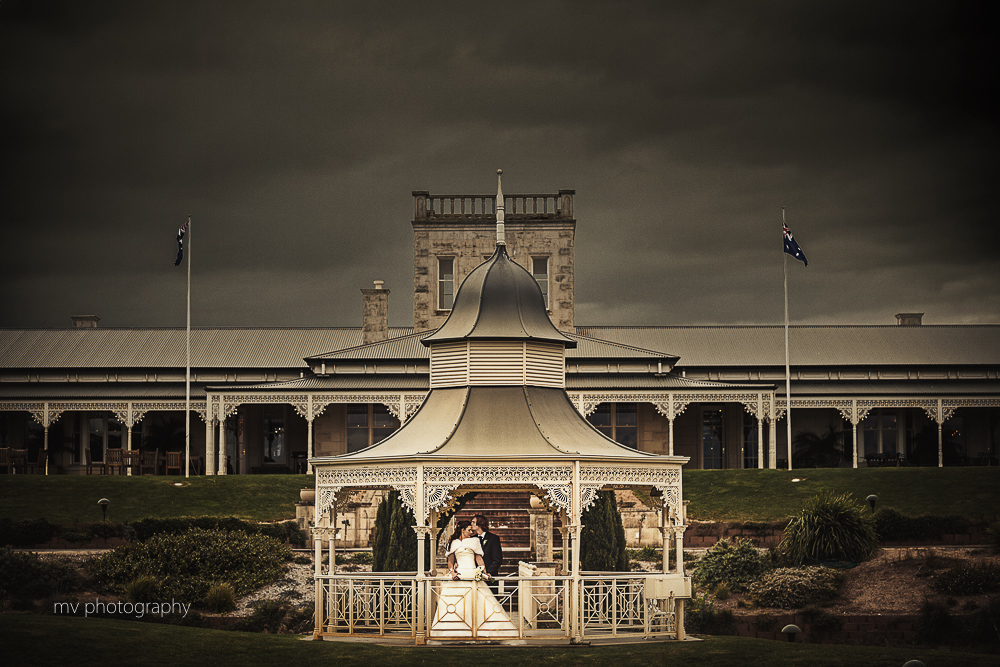
Another on from Jade and Bruce’s wedding, this time from the reception venue, Marybrooke in Sherbrooke. This is the most complex and bravest shot I have attempted on a wedding day when the time was short, it was almost pitch dark and it was raining. Thanks to my second photographer Alexander Gardner he made this shot possible; I had the vision of the image and positioned the lights and camera and he setup the flash triggers and flash settings. Thank god I have pro quality gear as the rain, even though not heavy, it was very constant.
First step here was to position the car, and thanks to the driver, we nailed that pretty quickly. To give life to the background I had the venue manager put on as many lights as possible inside to help balance the foreground lighting. I set my exposure for the ambient lighting in camera then started building light with the flashes. To camera right is a flash on a stand inside a small soft-box so I could soften the light on the couple, but the distance involved still cast defined shadows (this could only be fixed by a larger light source). A colour temperature orange gel was used over the flash to warm it up to match the lighting in the building. Past the car is another flash on a stand firing completely bare back towards camera, this had two uses where it would separate the black car from the background and give edge definition to both the couple and the tree. The fact that it lit up the rain too was a happy accident. Once the lighting was set I got the couple to come out and spent just five minutes building poses until I got what I wanted. The results of the hard work by Alex and myself paid off for a magical shot that the couple loved.
I’m not often around late enough for the first dance, but Jade and Bruce decided to do it straight after their entrance, which is fine by me! This image is quite simple but I love the moment the both of them are having. The diagonals of the roof and the pattern of the ceiling lights are all deliberate for a dynamic composition. The image is exposed by using a pop of fill flash bounced off the wall to the left of me balanced with ambient lighting in the room, so you can’t even tell it has been lit by flash, a technique I strive for as I hate the look of direct flash.
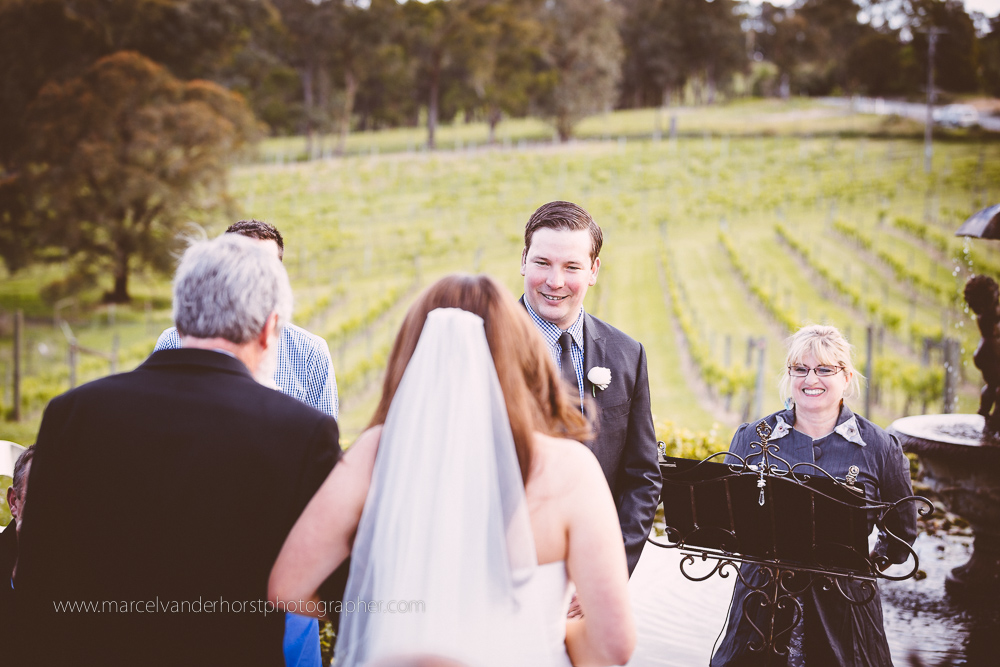
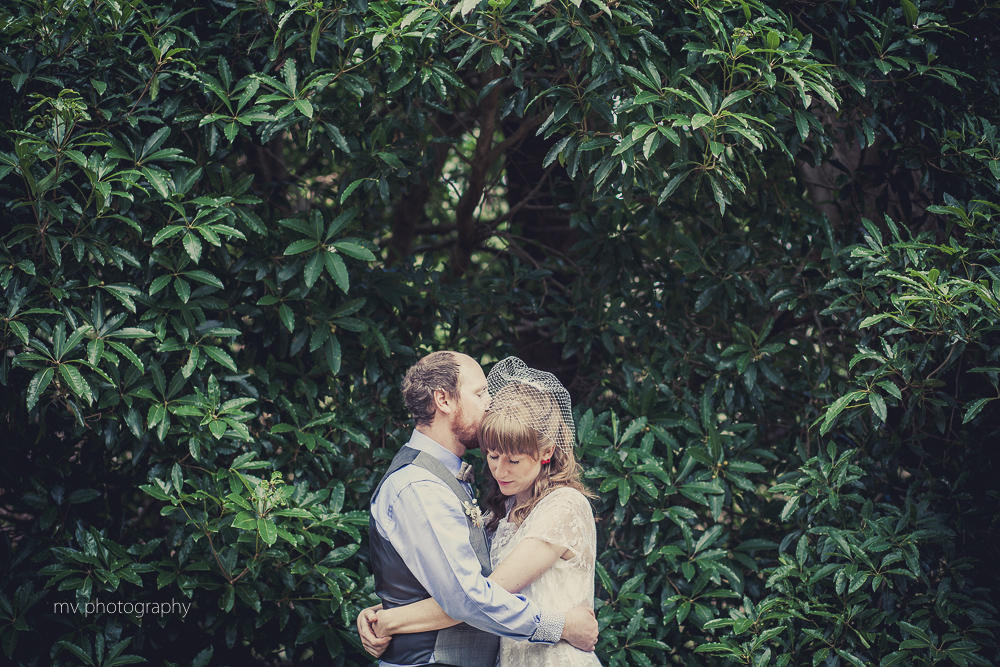
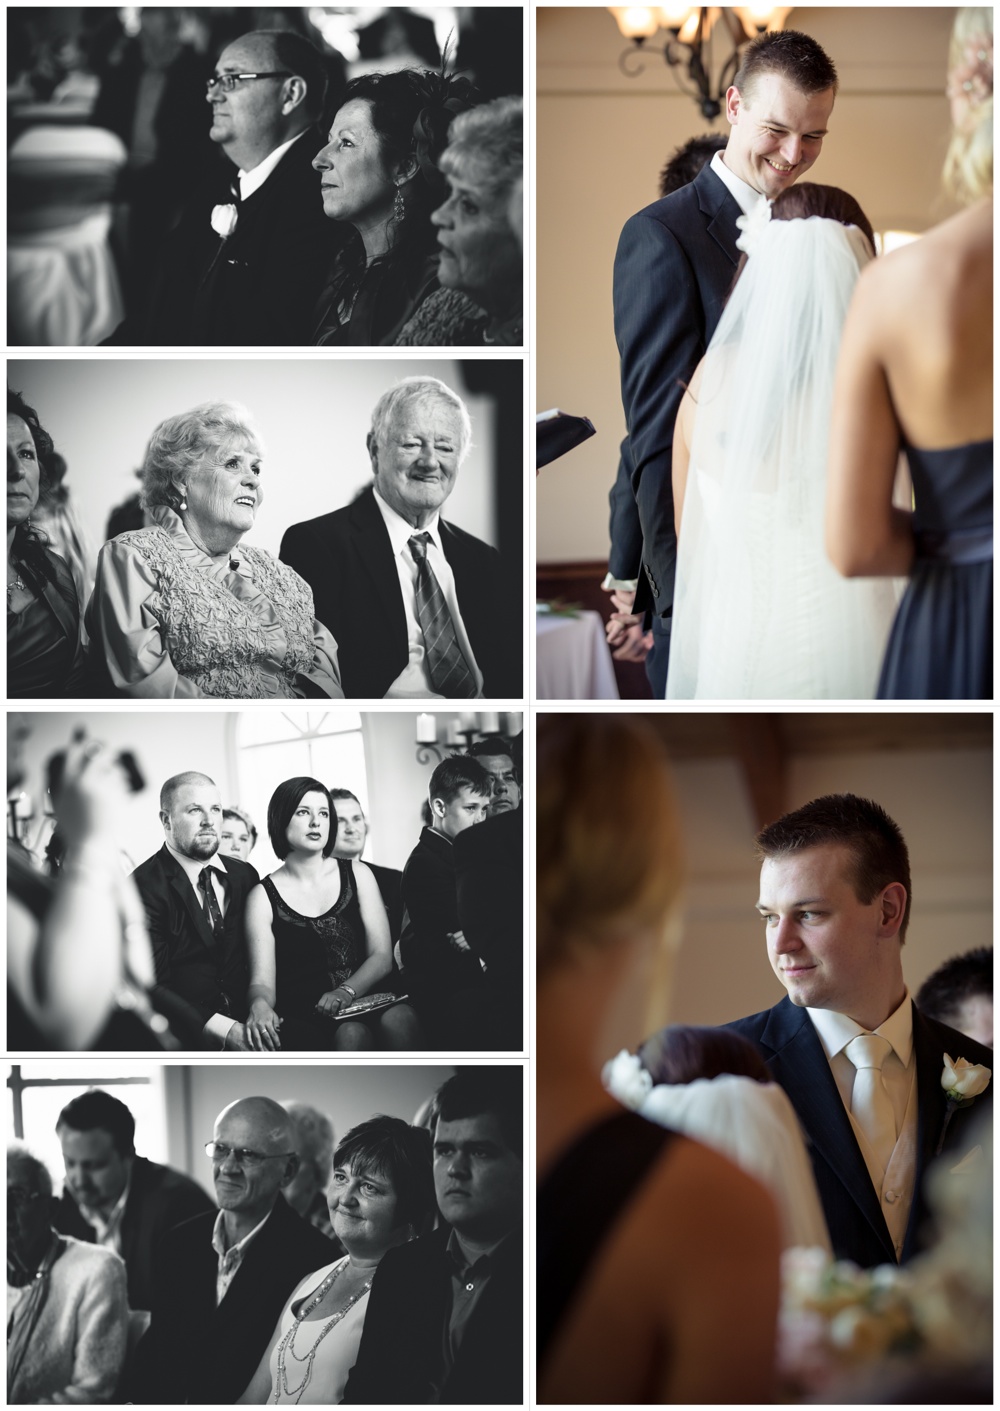
Sharni and Ryan’s wedding has been the most down to earth wedding I have seen. The atmosphere was fantastic and they were a fun couple to work with (they all are really). This is during a very quiet time of the ceremony where they were deep in prayer and you could hear a pin drop, or a camera shutter open and close for that matter. This is a time that no other guest’s camera in the room captured making this one even more special. The love the halo of light coming from the window behind the couple to give an almost ethereal feel to image. I shot low with a wide angle lens and used a symmetrical composition to focus the visual towards the couple.
Straight after the ceremony it was bubbles all round, this moment is a combination of luck and expecting something to happen, with my exposure set and the camera up to my eye.
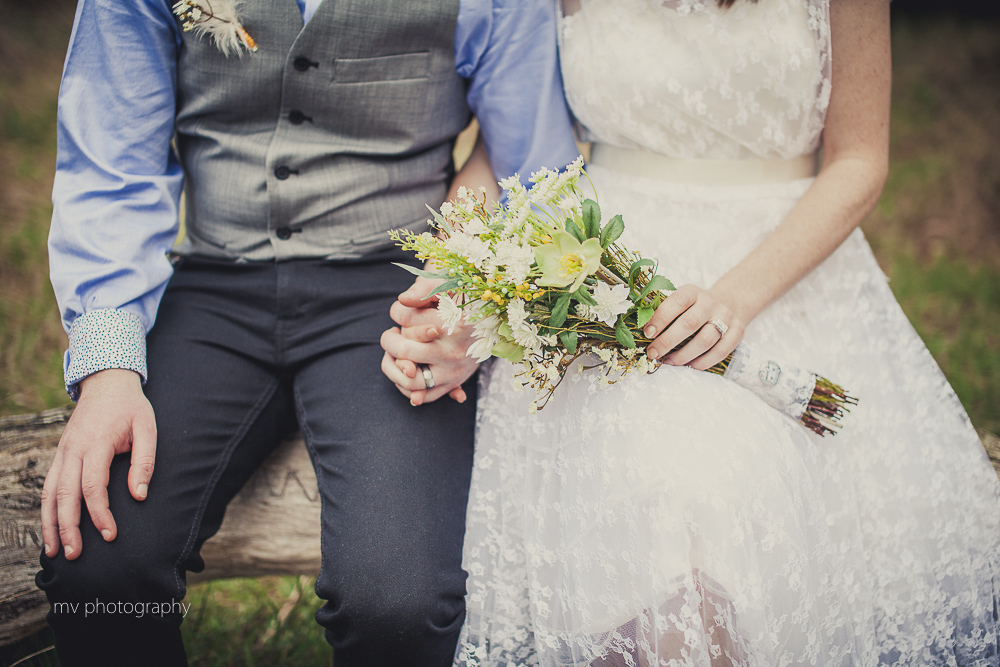
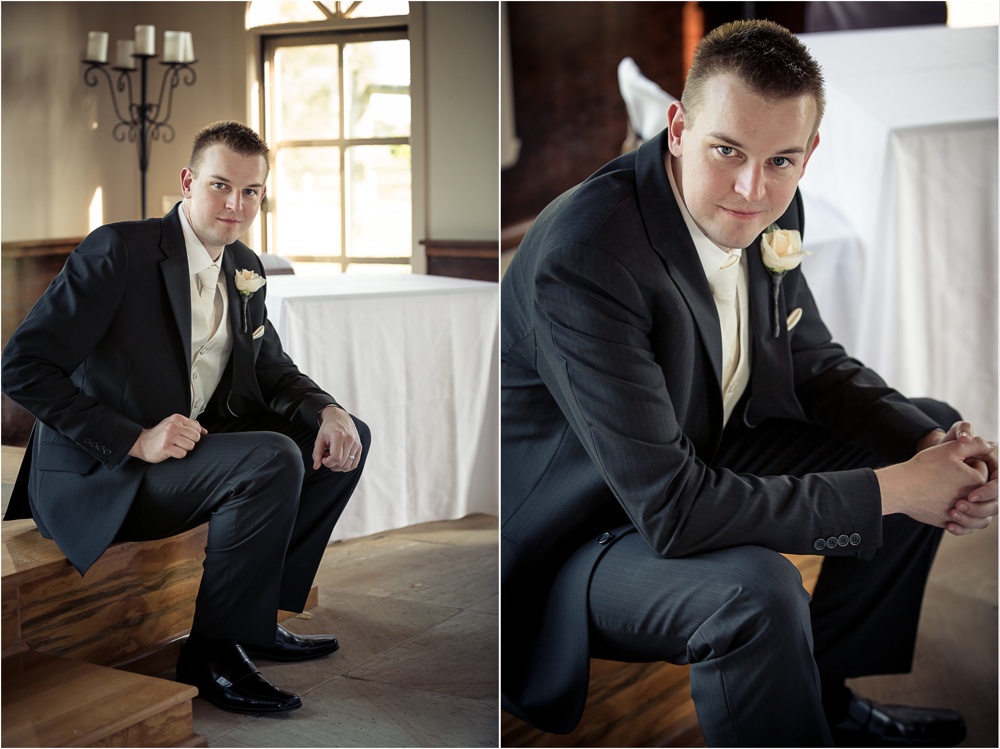
I threw this one in simply because I like it, its simple but shows a good connection in the couple and sums up their style with their vintage style clothing and homemade flower arrangement.
Sharni and Ryan responded to direction really well, this is one of many successful images from the series we shot at this location in Ringwood. Sharni’s eyes tell the full story here, cheekiness, shyness and playfulness all in one. This was shot with the good old 50mm lens at a super wide aperture to get a shallow depth of focus. To ensure I got her eyes sharp I had to lock focus and move my head backwards and forwards and focus manually with my eyes. The only thing I’d change is I wouldn’t mind shooting it with a longer focal length like 85mm to flatten out the perspective a bit more.
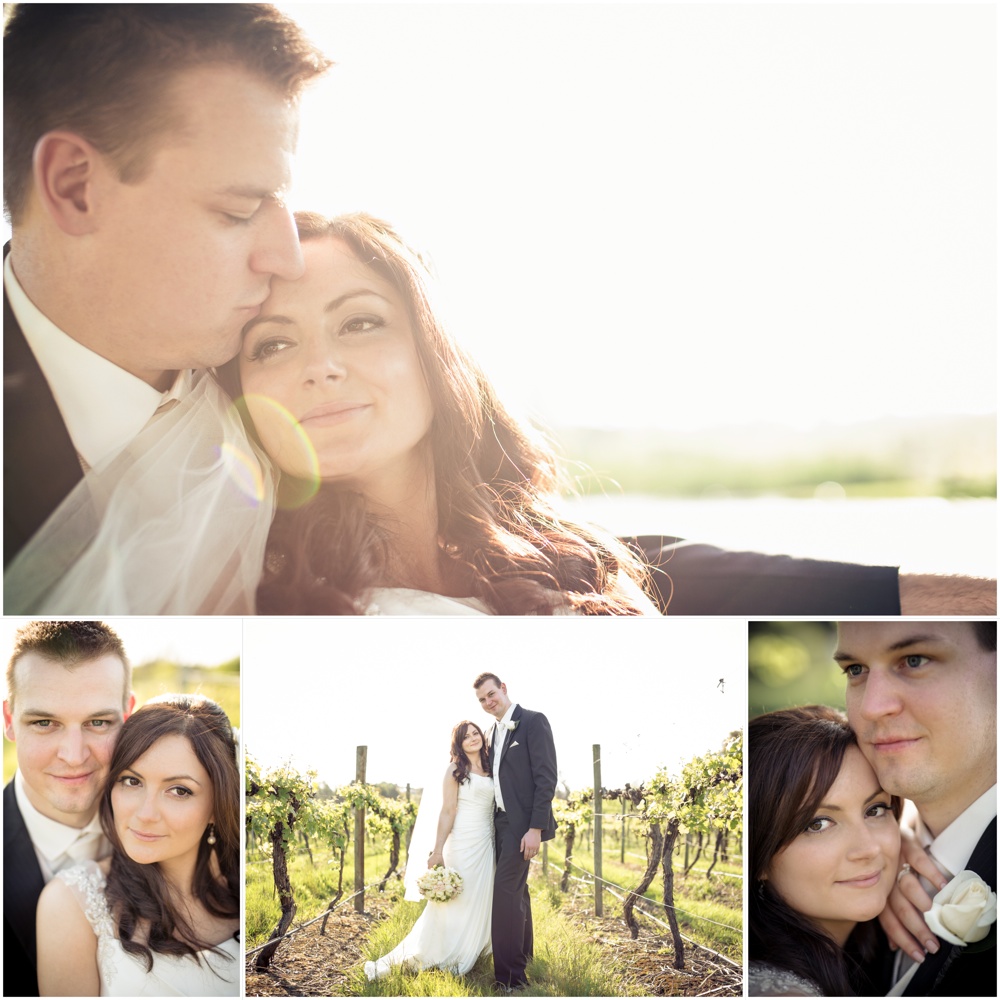
The final one from Sharni and Ryan’s wedding hangs in my office as a 20×30″ gallery wrap. The tree here was specially chosen for the alcove type shape they could stand in so I could control the light fall on them to some degree. I started building their pose and Sharni and Ryan took care of the rest. I went the spacious composition as I saw some shape in the tree that framed them.
I always love shooting the bride and groom getting ready part of a wedding day, you get so many emotions shared with the subjects closest friends and family. Here you see Tanya (full blog post here) with a nervous look on her face and this is the moment where all of her bridesmaids had finished doing up the dress and were stepping back to look. The room’s light was gorgeous, it being focused through one window camera right. It was very sunny outside so I got good shadows which increased contrast. I had to jostle for position here as the room was quite full with four bridesmaids, Tanya’s mum and my other photographer. The final central composition was deliberate to get in as much as possible that’s going on around her to give a sense of context. I did wish I had a slightly wider lens to capture more, but that is because I was shooting a fixed focal length at the time.
This shot is taken virtually in the same position as the last, but this time with more precision and Tanya being aware of me this time. I like this shot as it represents Tanya’s amazing elegance and beauty. The composition is very calculated here deliberately placing Tanya on the right hand third line, the door on the left hand third and the floor edge on the lower third.
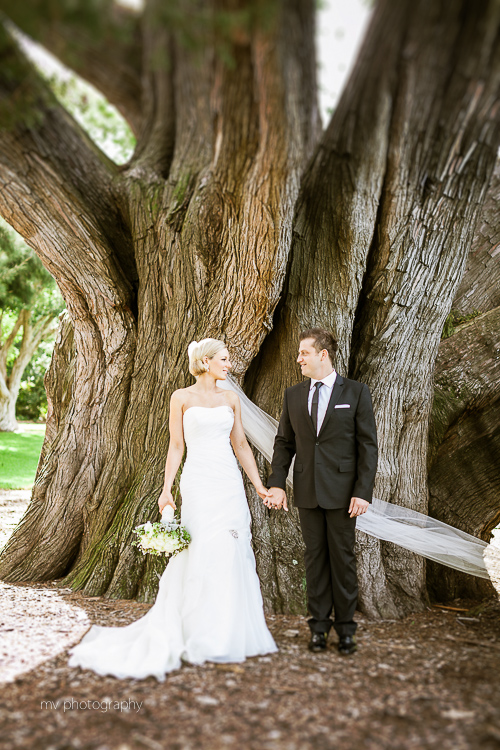
One thing I really liked about Tanya and Roreigh’s Wedding was the fact the formal portrait session was before the ceremony, so there was less of a time constraint and the couple could ease into the day. Here we started at the Botanical Garden Melbourne under one of the giant Cypress trees which was amazing. It was high sun at the time, so I had to shoot on the shady side to avoid hot spots and contrasty light. The pose is the classic cake topper pose, but I had them look at each other and smile. The veil was a carried by the wind to add some extra dimension.
This image was in exactly the same position as the last photo as I had to use the nice light on the shady side of the tree. They are lit fairly evenly due to the bright conditions around the tree and reflecting off the ground. I don’t often shoot someone from below the chin line unless the subject can really pull it off. Here I could see a defined shadow on Tanya’s jawline to give that area shape and I made sure her head wasn’t tilted too far downward. I positioned myself to get a bit of sun flare on the lens to add some atmosphere and I had Roreigh softly kiss Tanya on the forehead for a peaceful and loving image.
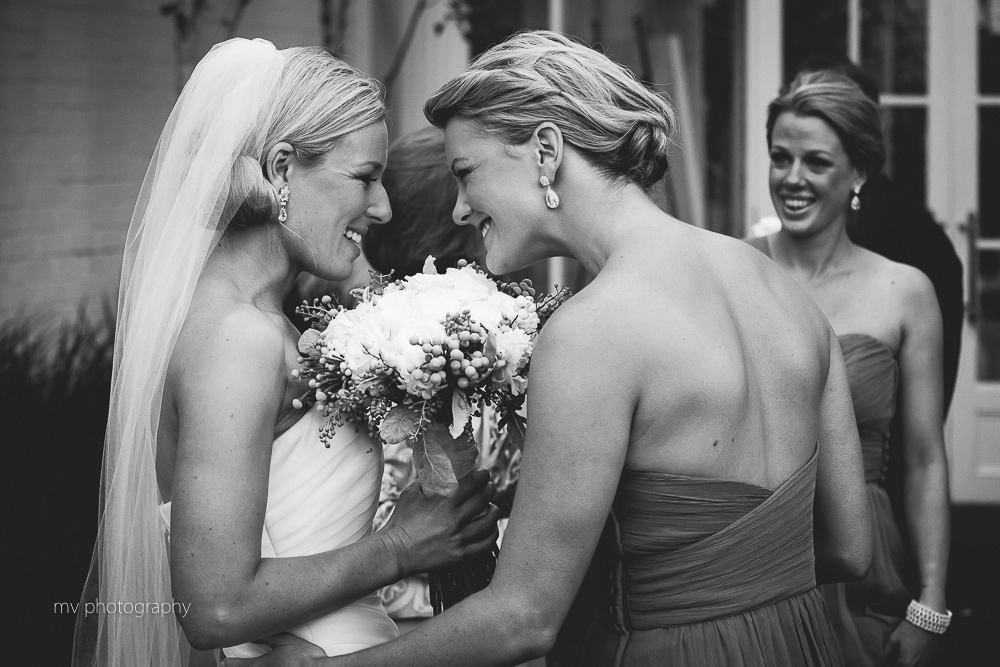
My collection of little intimate moments like this is massive, but this is my favourite of the year. It doesn’t always have to be between the bride and groom, but here is a moment where Tanya’s bridesmaid is congratulating her just after the ceremony. It’s times like these I always like to shoot with two cameras with different lens focal lengths mounted so I can swap between them quickly to shoot wide and push in close to the action and capture many things going on at the same time and also step back and look for the moments. During this part of a wedding day I will always have a camera up to my eye, firing shot after shot and always moving to capture different faces and moments. I often move in an arc around the action depending on light direction and try not to cross paths with the second photographer too much.
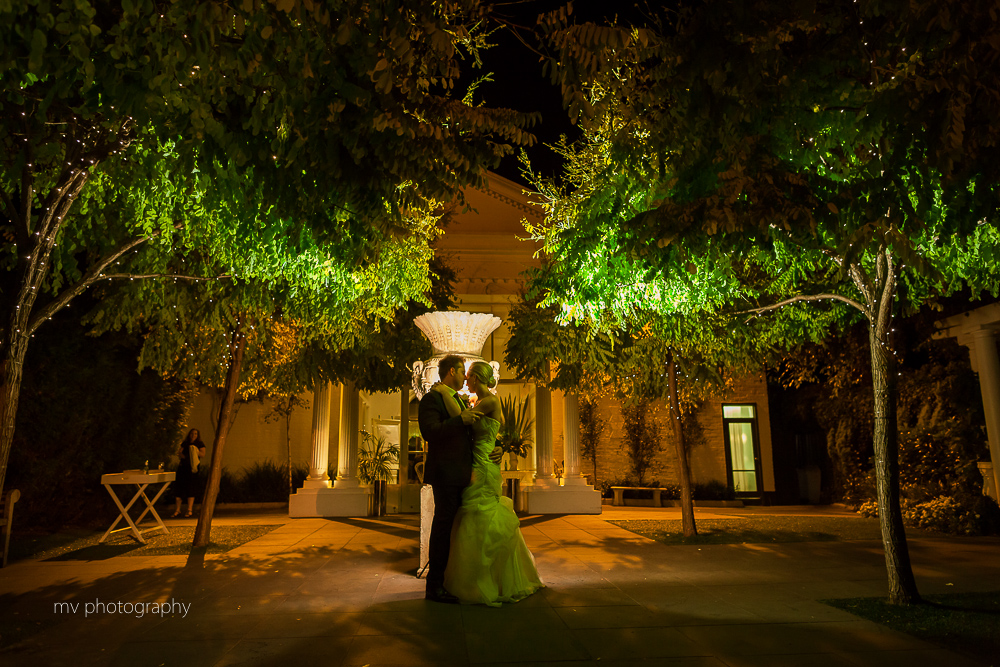
I mainly wanted to put this one in for its technical content more than anything else. Shooting in the dark is always a challenge, camera’s don’t like to focus, you can’t see everything in frame and you sometimes have to shoot at really high ISO levels to record the low light (when shooting handheld). This concept was a request from the couple and of course I was up for the challenge. The only ambient light present was the fairly lights which don’t give off any kind of light and the flood lights at the back of the reception venue. Those lights offered no kind of solution to lighting this shot at all. So out comes the wireless flash. I set a speedlight to manual and focused it upwards from the bottom of the white planter feature. I knew being white it would reflect a lot of light, with the dual purpose of creating a rim light for the couple and lighting the area around them. I was kind of happy with the results first try. I first got an ambient light level exposure level to render the building obvious but not too over powering, the flash then lit the planter feature and the tree tops nicely. Focusing was purely a guess, I set a medium aperture to gain reasonable depth of field and manually focused because the foreground was darker in real life than it appears in the photograph. The only thing I would criticise is the pose, I should have developed it a bit more from there, but I was more concerned getting the exposure and focus right than the content. Oh well, I think its pleasing nonetheless.
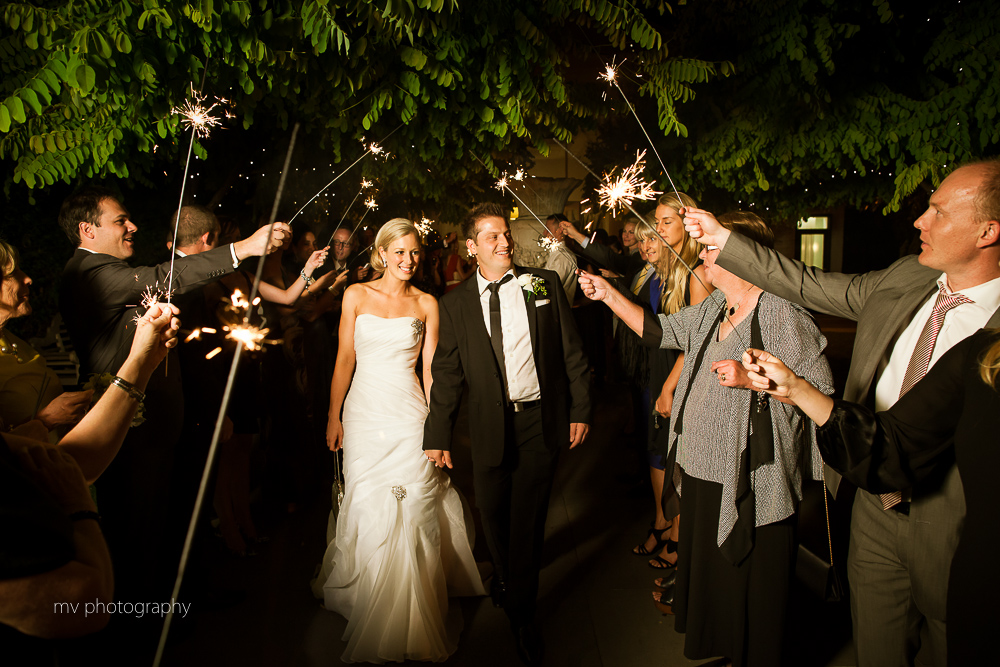
This was taken only a few feet further back from the above shot and boy, this is the most difficult shot I’ve taken in my career so far. There was literally no ambient light at this part of the courtyard. If the flash I was using hadn’t fired all you would see is the fairy lights, the sparker heads and lights from the interior of the reception venue. The lack of light wasn’t the only challenging thing happening here; it was the fact the couple would be moving towards me (so I had to walk backwards) which presented the focusing challenge again and also the fact I had less than two minutes to set up the shot. I already had a stand with a flash mounted camera left with a CTO gel on it to warm up the flashes colour temperature which makes it more pleasing to the eye. I then needed the light up high so I could throw the flash over the heads of the guests which weren’t there yet and I had to set my exposure using the back of my hand which is an old trick I learnt to measure for exposure before your subject arrived.
As I was shooting off camera flash with a dumb radio trigger, there was no focus assist lights used, I could have used an on camera flash, but the light would’ve have been as nice and that’s just too easy. I managed to get six frames off before I ran out of road and this was the best one, and I’m safe to say I nailed it!
This one is from a second shooting assignment with Kelly McKormick Photography who’s based Peninsula way so we were down around Rosebud for this wedding. This concept was an extension of a request from the couple, I just came up the idea of shooting from across the waterway and posing them like that. I knew the light would be even on them from where they stood. Even though the couple is centrally located in the lower third, I think the rest of the composition is successful because of the buildings forming a pseudo classic rule of thirds composition.
I cheated with this photo, it was Kelly who posed them I just shot from a different angle with a longer lens which threw the background out of focus to isolate the couple a bit more.
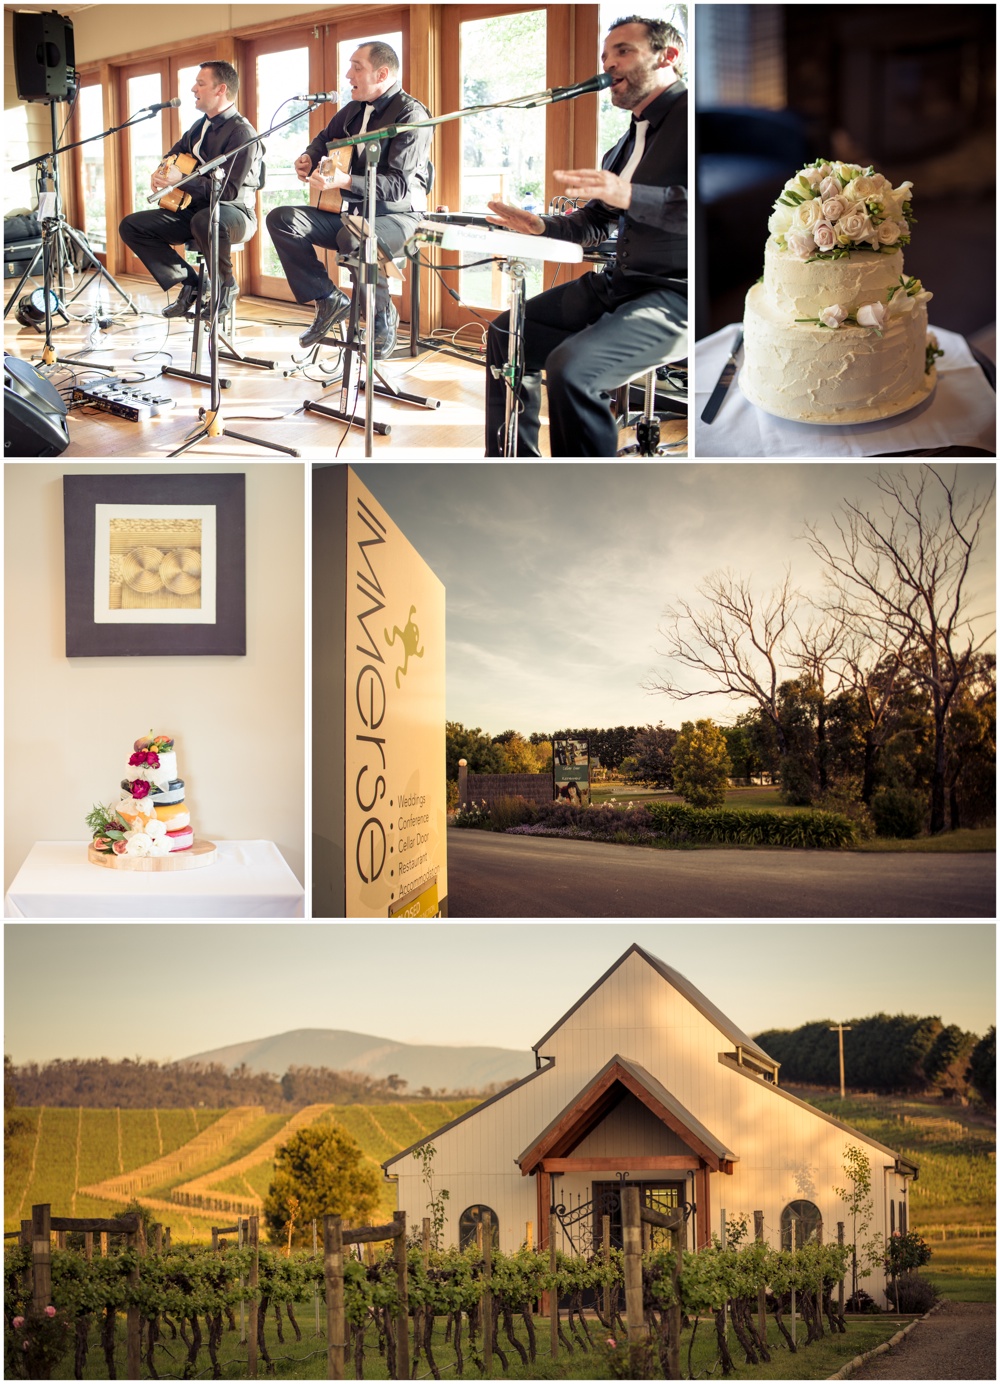
From one of the last weddings of the year, Nathalie and Matt’s wedding at Immerse Winery was gorgeous. This couple gave me a serious challenge because of their height difference, Matt being even taller than me I had my work cut out for me. What I tried here was I made Matt walk in the trench the tractor wheels normally fall when the grapes are picked and Nathalie on the higher ground in the centre of the row. The difference was only a couple of inches, but everything helps. I made them take a slow walk away from me and I then asked Nathalie to look back at me and Matt to look at Nathalie. I like everything about this image, the light was great, the body positions look right and it screams to me a ‘Real Weddings’ magazine cover.
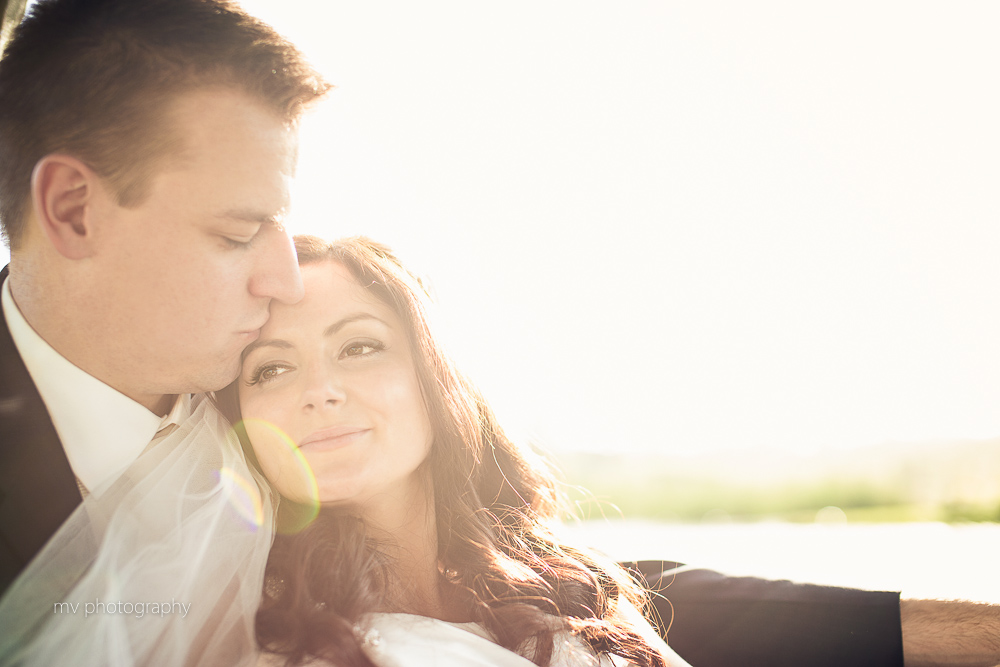
The eyes of Nathalie are very striking here and she has a perfectly symmetrical face which is perfect for photography. Her makeup and hair stylist did a fantastic job too. This was more so a portrait of Nathalie than the both of them, as always I started from afar to build trust and confidence with the subject then I get in close. The sun was blaring over their shoulders here which gave dramatic contrast in the highlights. My last image for this post is one of the most stunning of the year. You can sense the happiness the two of them are feeling by the relaxed pose and very soft eyes. Every part of this image is very planned and intentional. Everything from the pose and eye direction, the sun flare over the front of the lens and the lens flare in the lower left corner. I did need that spot a little lower but its is hard to see in camera as it always translates differently on the capture.
I love it when I deliver a client’s wedding images to them and when they see them they make ‘oohs, awes’ and burst out laughing when they are reminded of the fun times they had on their wedding day. Nathalie and Matt did exactly this, a wonderful couple with down to earth souls and a lot of fun. The beautiful flowers are from Debbie O’Neill and the venue, Immerse Winery is ideal for a ceremony and reception on one property. For a killer trio band look up the boys from Three Style, they had the crowd going all night. I hope you enjoy the images, I enjoyed taking them. I’d love it if you would share this post via Facebook using the Like button. Marcel.
To make an appointment to talk to me about your wedding day, please visit the Contact Page or phone 0409 621 089
Here is the final blog post from Jade and Bruce’s wedding (see the sneak peek here along with all the locations). It was a fun day with an awesome couple, rain to challenge me as a photographer and the oh so talented MR Alexander Gardner as second photographer and lighting grip guru. The venues were stunning, the coolest limo got to take the couple around and everyone was relaxed and there for a good time. Enjoy the photos and to make you booking with MV Photography please call 0409621089 or email: marcel@mvphotography.com.au